

The Windows Administrator account provides full, unrestricted access to your PC. As of Windows Vista, it is disabled by default. This account has more privileges than other user accounts, and can easily cause problems if misused.
We don’t recommend you enable the Windows administrator account, especially if you don’t need to. However, if you are an experienced Windows user and want the additional flexibility this account offers, you can enable it temporarily.
We used Windows 10 in our examples, but these procedures will work in Windows 8, 7, and Vista as well.
Table of Contents
Types Of User Accounts In Windows
There are three types of user accounts in Windows, each having a different level of permissions.
Standard User Account
The standard user account is a restricted, un-elevated user account. As a standard user, you can do almost anything you can do with an administrator account.
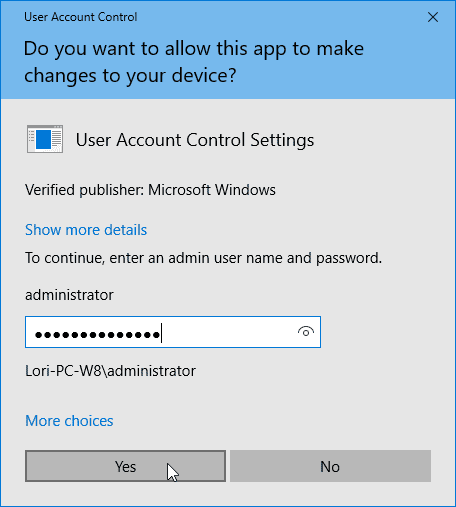
If you try to do something in a standard user account that requires elevated rights, such as running a program, Windows displays the “User Account Control” dialog box.
You have to enter the password from the built-in administrator account before Windows will allow the action to continue. If there is no password applied to the administrator account, click “Yes” to continue.
Administrator-Level User Account
An administrator-level user account is an un-elevated account created by default when you install Windows. It’s also available in OEM versions of Windows that are already set up, such as a Dell or HP computer.
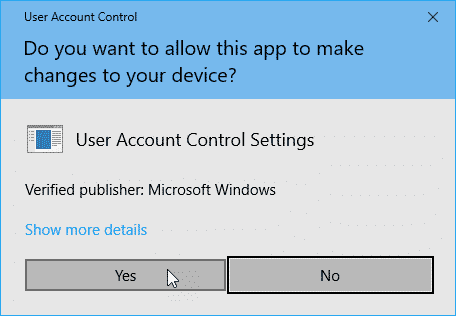
As an administrator-level user, you have complete access to the system and can make any changes you want. However, if you try to do something that requires elevated rights (such as running a program), Windows displays a “User Account Control” dialog box.
You simply have to click the “Yes” button on that dialog box before Windows will allow the action to continue.
Built-In Administrator Account
The disabled, Windows administrator account is a local account that has full, unrestricted access to the Windows system. When using the administrator account, you will not be prompted by the “User Account Control” dialog box, when you do anything that requires elevated rights.
Since you have unrestricted access in this account, it is recommended you use it sparingly. Only use it when absolutely needed and if you know what you’re doing. Make sure this account is disabled when you’re not using it.
Enable Or Disable The Windows Administrator Account Using An Elevated Command Prompt
The easiest way to enable the Windows administrator account in Windows is by using an elevated command prompt. This method works in any edition of Windows, e.g., Professional, Enterprise, Ultimate, Home.
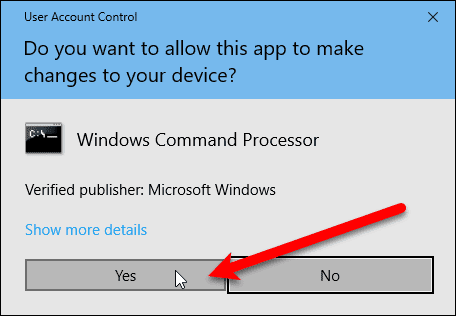
Press “Windows key+X” to open the Power User menu and select “Command Prompt (Admin)“.

If the “User Account Control” dialog box displays, click “Yes” to continue.
NOTE: You may not see this dialog box, depending on your User Account Control settings. We don’t recommend disabling UAC entirely, however.

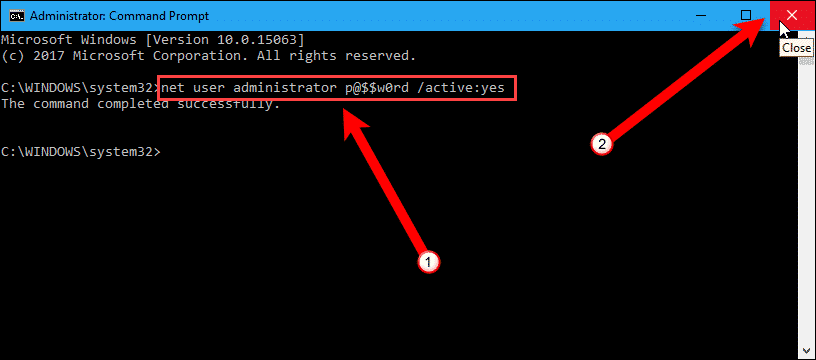
In the “Administrator Command Prompt” window, enter the following command at the prompt and press “Enter“.
net user administrator password /active:yes
Replace “password” with the password you want to use for the administrator account. You can also enable the administrator account without a password by leaving the password out of the above command. However, we don’t recommend that.
Click the “X” button in the upper-right corner of the command prompt window to close it.
The built-in administrator account will now be available on the login screen.
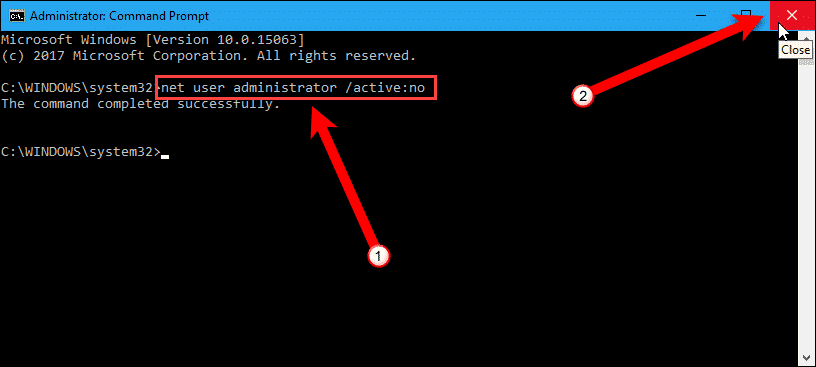
You should disable the Windows administrator account once you are done using it. To do this, open an “Administrator Command Prompt” window again. Type the following command at the prompt and press “Enter“.
net user administrator /active:no
Click the “X” button in the upper-right corner of the command prompt window to close it.
Enable Or Disable The Windows Administrator Account Using Local Users And Groups
If you’re using the Professional, Enterprise, or Ultimate version of Windows, you can use the “Local Users and Groups” tool to enable the Windows administrator account.
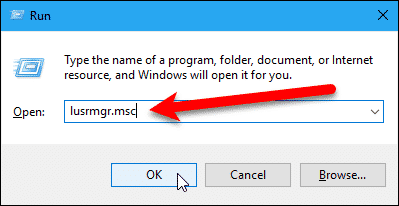
Press “Windows key+R” to open the “Run” dialog box. Type “lusrmgr.msc” in the “Open” box and click “OK” or press “Enter“.
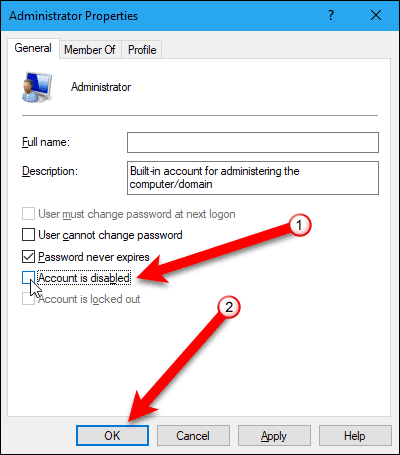
Click “Users” in the left pane. Then, double-click on the “Administrator” user in the center pane.

On the “General” tab on the “Administrator Properties” dialog box, uncheck the “Account is disabled” box. Then, click “OK“.
Go to “File” > “Exit” or click the “X” button in the upper-right corner of the window to close the “Local Users and Groups” window.
The Windows administrator account will be available on the login screen. To disable the administrator account, check the “Account is disabled” box on the “Administrator Properties” dialog box again.

Enable Or Disable The Windows Administrator Account Using Local Security Policy
If you’re using the Professional, Enterprise, or Ultimate version of Windows, you can use the “Local Security Policy” tool to enable the Windows administrator account.
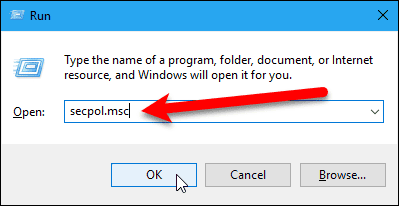
Press “Windows key+R” to open the “Run” dialog box. Type “secpol.msc” in the “Open” box and click “OK” or press “Enter“.
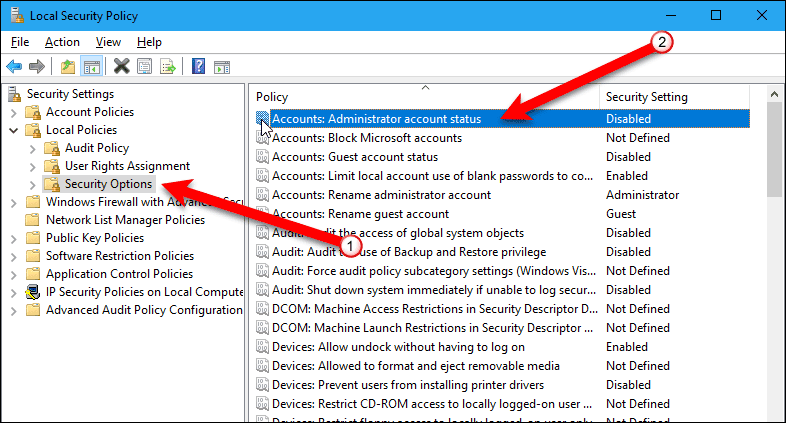
Click “Local Policies” and then “Security Options” in the left pane. Notice that the “Security Settings” for the “Accounts: Administrator account status” item is “Disabled“. Double-click on that item.
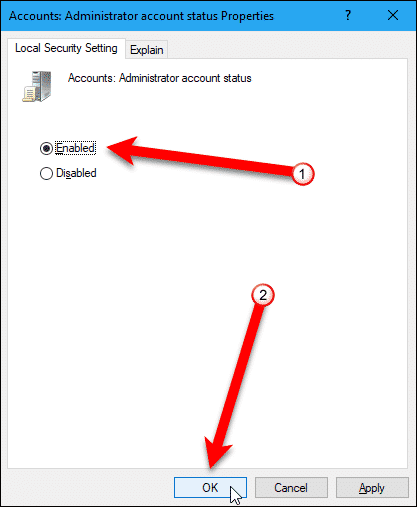
On the “Local Security Setting” tab on the “Accounts: Administrator account status Properties” dialog box, select the “Enabled” option. Then, click “OK“.
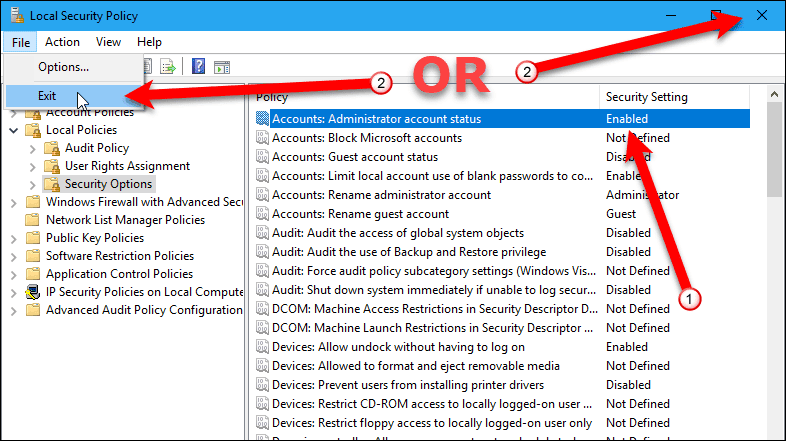
The “Security Setting” setting for the “Accounts: Administrator account status” item now reads “Enabled“.
Go to “File” > “Exit” or click the “X” button in the upper-right corner of the window to close the “Local Security Policy” window.
The Windows administrator account will now be available on the login screen. To disable the administrator account, select the “Disabled” option on the “Accounts: Administrator account status Properties” dialog box.
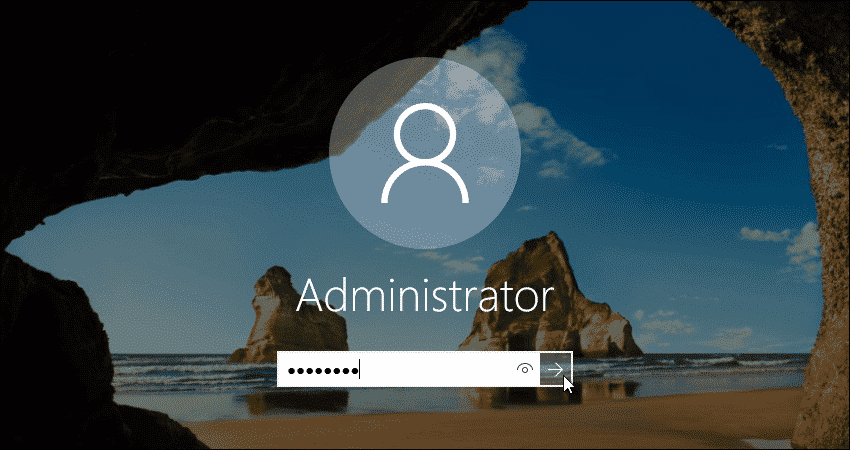
Switch To The Administrator Account
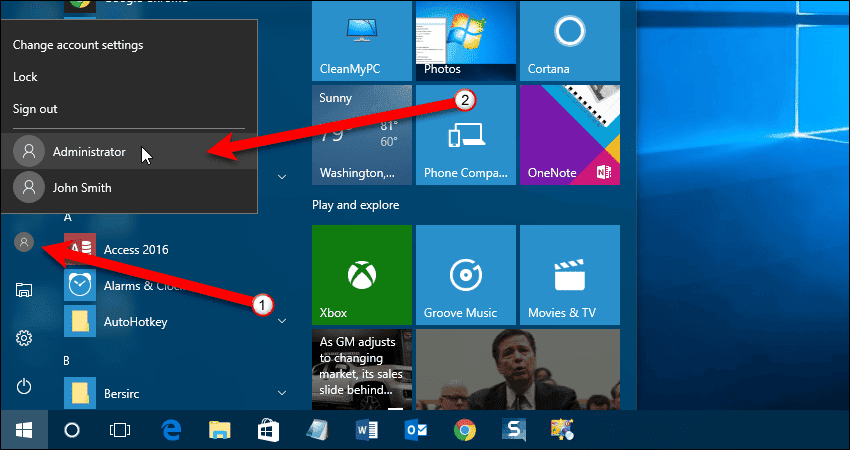
You can also switch to the Windows Administrator account on the Start menu. Open the Start menu and click the user icon. Select “Administrator” from the pop-up menu.
Rename The Windows Administrator Account
Once you’ve enabled the Windows administrator account, you should rename the account to protect it. Hackers and malware distributors can find ways to gain access to the administrator account on your computer. So your computer is at greater risk when it’s enabled.
This method works in any edition of Windows, e.g., Professional, Enterprise, Ultimate, Home.
Press “Windows key+X” to open the Power User menu and select “Command Prompt (Admin)“.

If the “User Account Control” dialog box displays, click “Yes” to continue.
NOTE: You may not see this dialog box, depending on your User Account Control settings. We don’t recommend disabling UAC entirely, however.
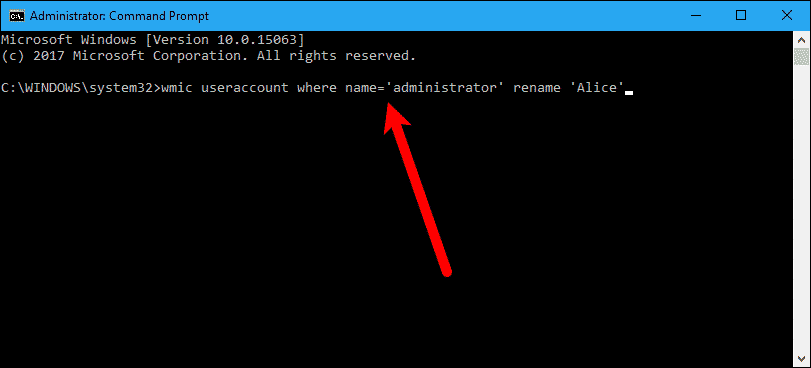
Type the following command, or copy and paste it, at the command prompt:
wmic useraccount where name='administrator' rename 'newname'
Replace “newname” with the name you want to give the built-in administrator account. The single quotes around the name are not needed if there are no spaces in the name. But they are required if there are spaces in the name.
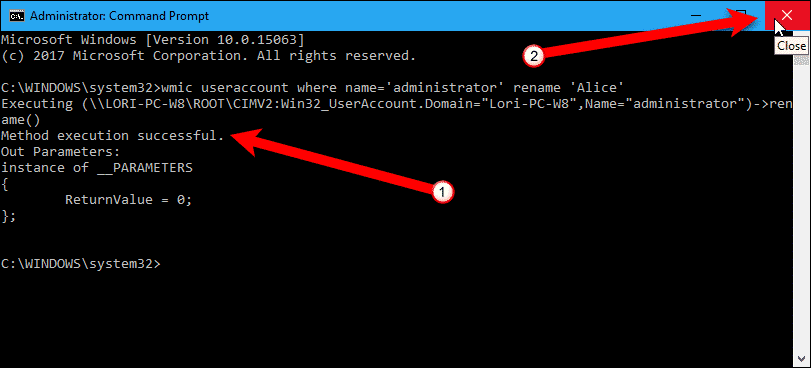
You’ll see some text printed to the screen and then a message saying that the method execution was successful.
Click the “X” button in the upper-right corner of the command prompt window to close it.
The new name of the Windows administrator account now displays on the login screen and on the user menu on the Start menu.

What have you used the Windows administrator account for? Let us know in the comments.
Comments are closed.