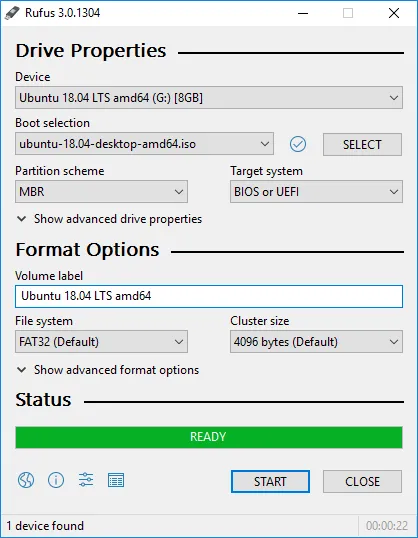
Have you ever been faced with the need to install a new operating system on a crashed PC but realize that you don’t have the installation disc? For most people, such a case is always discouraging and disheartening because they know that the only way to install a new OS is to use an installation disc. Actually, all you need is a USB with a good capacity and a utility like Rufus on Mac. Rufus is a free, portable open-source utility that you can use to create bootable USB flash drives. Rufus is small in size, but it surprisingly has everything you need as far as the above are concerned.
Table of Contents
Does Rufus Have a Mac Version?
Rufus is primarily a Windows application and currently, it supports 64 or 32 bit Windows XP/7/8/10 only. This means that you can not use Rufus on the normal Mac computers. If you need to run Rufus on a Mac, then it will be imperative for the computer to have a dual boot Windows installed on Mac. However, this is not an easy task at all.
To those in the dark, this simply means that you will need to have a Windows Operating system installed in your Mac computer. However, if you didn’t want to have two operating systems running on the same machine so that you can access Rufus, there are quite a number of alternatives you can use to achieve the same functionalities of Rufus on Mac.
How to Run Rufus on macOS?
The only way to run the Rufus on a macOS is install a dual Windows system or a virtual machine on your macOS, but this is a complex and massive project.
Install Dual Boot Windows on Mac
Dual booting is the way of installing Windows and macOS on a single computer and allowing you to choose which system to boot. The biggest benefit to dual-booting is that you can run windows software on your Mac computer. Here we can create a dual booting via BootCamp utility.
- Step 1. You need to prepare an USB flash drive with a storage capacity of 16 GB or more. Then go to Applications > Utilities and open the Boot Camp Assistant.
- Step 2. Click the Continue to next and select following task:
– Create a Windows installation disk.
– Install Windows 7 or a later version. . - Step 3. Select the Windows 10 ISO image file you pre-prepared.
- Step 4. In the Install Window screenshot, you need to select the Boot Camp partition size, it will be adjusted to 4 8 GB by default, but we recommend you to set at least 64GB or higher.
- Step 5. Click Install. Windows support software will now be downloaded, after a while, you will see Windows 10 setup screen.
- Step 6. As with a normal Windows installation process you will need to configure your system step by step, including language, type your product key and more.
- Step 7. Install the drivers and everything else necessary tools on a Mac computer.
- Step 8. After all the necessary drivers are installed, your dual-booting system should be ready now. To switch between Windows and macOS, you just need to simple press and hold the Option key during the startup.
Now, you can install and run Rufus on your macOS and start to create a bootable USB installer.
Install Windows Virtual Machine on macOS
To run Rufus on macOS, you can install and run Windows 10 on macOS using Virtual machine softwares. which makes it much easier than configuring Boot Camp, but this is also a complex and error-prone task.
- Step 1. Download and install virtuabox tool on your macOS, then click the “New” button to build a new virtual machine.
- Step 2. Give a name for your virtual machine and continue.
- Step 3. In the primary VirtualBox screen, select “Start” to boot the new Windows 10 volume..
- Step 4. Next, you need to specify the amount of memory and allocate to the virtual machine. In my experience, I recommend at least 1GB for 64-bit system.
- Step 4. Click on the second option “Create a virtual hard disk now, then click the Create button..
- Step 5. Then in the new window, select the first option “VirtualBox Disk Image” then hit the “Continue” button.
- Step 6. Here select the “dynamically allocated”.and wait to install virtualBox on your macOS.
- Step 7. Now let’s start to install Windows 10 on your virtualBox. Click green arrow icon “Start” and the Windows will start installing on VirtualBox.
- Step 8. Now, the Windows 10 will start to install on VirtualBox. Choose the keyboard and language and click next button.
- Step 9. You also need to complete some basic Settings for Windows installation. After that, launch Windows 10 from virtualBox, this is the complete screenshot.
Now, you can install and run Rufus on macOS via virtualBox, this method is too complicated, but it does help you run Rufus on macOS.
Rufus on Mac Alternatives
As we mentioned Rufus has no Mac version but there is a lot of alternatives that can be installed and run on macOS directly with similar functionality or even better than Rufus. So, if you’re looking for a Rufus on Mac, the following tools should be the best replacements.
WonderISO for Mac
WonderISO for Mac is small-sized utility that enable users to create a Windows bootable USB from ISO file on macOS rapidly and one-time success rate of creation. It provides multiple other functions besides BURN to handle your ISO image file, including ISO Editor, ISO Creator, ISO Extractor and Disc Copier. This tool provides a GUI-based interface and is intended for all inexperienced users.
Unetbootin
When it comes to creating an bootable USB drive, the first thing comes to mind is UNetbootin software, it’s a cross-platform and free utility that can be used to create bootable Live USB drives for Linux distributions, create dual-boot installs and make a “frugal install” of the desired distribution. If you want to burn Linux ISO on macOS, UnetBootin is absolutely a great Rufus on mac alternative.
Rufus is a great application for burning ISO to USB. Unfortunately, there is no Mac version yet. So for burning ISO to USB on Mac, you have to use third-party alternatives like UUByte ISO Editor to get it done. The suggestions in this post almost do the same thing as Rufus on Windows so don’t worry about the functionality. Go ahead and pick up the best rufus alternative according to your experience.
Also Check our article “Let’s Talk About the Latest and Best X-Box Resolver Gamertag IP Puller 2021“


Comments are closed.