


Yesterday, Google published the Android 4.4 factory images for all Nexus 7 and Nexus 4 devices. Although an OTA (over the air) update is currently being pushed out to Nexus 7 WiFi models, owners of a Nexus 7 LTE, a first-gen Nexus 7 or a Nexus 4 were still desperately waiting for their 4.4 update.
With factory images, however, you can go ahead and flash them onto your device to get Android 4.4 before being able to update an OTA update. While some android-savvy people already know by heart how to flash a factory image, others might struggle with the procedure and be scared of messing up their device, although it’s very difficult to completely brick a Nexus device.
For that reason, we created a guide on how to flash the 4.4 factory image so that everyone with a Nexus 4, Nexus 7 LTE or Nexus 7 (2012) can enjoy Android KitKat.
Table of Contents
How to flash Android factory images step-by-step
Although the steps below are fairly easy to do (we used the same ones to flash our devices), please note that we don’t take any responsibility for any negative outcomes.
Pre-flash preparation
-
Make backups of all important data. I recommend using Titanium Backup (root required) to backup all your apps and system data. Although it’s not necessary for the whole process, it’s smart to do a Nandroid backup of your system. A Nandroid backup makes an entire backup of your device including your memory block and partitions. For that, however, your device needs to be rooted and you need a custom recovery tool.
-
Download Android SDK. The official developer tools contain adb and fastboot, which you’ll need later. Also, make sure to install the Google USB driver on your computer.
For your convenience, copy the folder “platform-tools” in the “sdk” folder and paste it to an easily accessible directory, such as C:\Users\YourName on Windows. You can also rename the folder to “nexus” or something else if you like. -
Enable USB Debugging on your device. You can activate it in “Settings – Developer options”. In case you don’t find that location, it’s because you didn’t enable it. To do so, simply go to “Settings – About phone/tablet” and keep tapping “Built number” until you unlock the developer options. You should get a small screen notification once you succeeded.
-
Connect your device to your computer with a cable.
-
To be able to flash a factory image (or a custom rom) the bootloader of your device has to be unlocked. Please be aware that unlocking the bootloader will wipe all data on your device, so make sure to have backups.
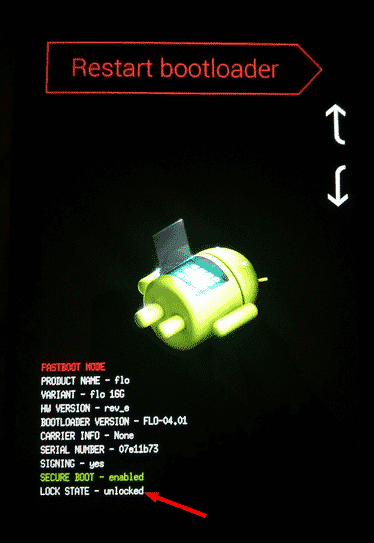
Before unlocking it, you can check if it is locked or unlocked. For that, reboot your phone into fastboot and check the last line “Lock state”. If you never rooted your device or flashed anything, than it should be locked and you can go on.
To unlock the bootloader, follow these steps:-
Reboot your phone into bootloader. To do that, turn off your device first, then press the power button and the volume-down button simultaneously until it boots into bootloader.
-
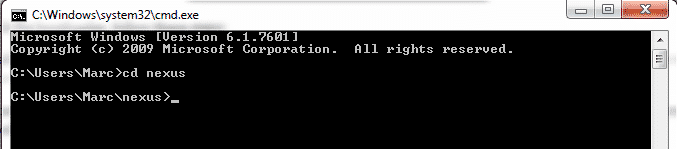
Start the windows command line or mac terminal and change the directory to the one of your renamed “platform-tools” folder. The command to change directories is cd location/of/folder. In my case below, I renamed it to “nexus”.
- Once you’re in the correct location, it’s time to give the unlock command. That’s the one wiping your data, don’t forget that. In the command line type fastboot oem unlock, execute it and agree to the unlock on your device. That’s it. To be sure, reboot again into the bootloader and check if your lock state is “unlocked”.
-
Flash instructions
Note: There’s a way to flash factory images without wiping your device. You should only do that if you’re on stock and not on a custom rom. See step 3 for more details.
- Download the Android 4.4 factory image. Make sure to download the correct image for your device.
- Unzip the downloaded tgz file and place the unzipped files in the (renamed) “platform-tools” folder.
- Skip this step if you already wiped your device by unlocking the bootloader or don’t care to lose the data. If you’re bootloader was already unlocked and you don’t want to wipe your device, then you need to edit the flash-all.bat (win) or flash-all.sh (mac) file with a text editor before executing it. Remove the “-w” part where it says “fastboot -w update image-….zip”. It should then look like that: “fastboot update image-….zip”. Remember, if you want to go from a custom rom to stock 4.4, it’s highly recommended to wipe your device. If you’re already on stock, then wiping is not necessary.
- Let the flash-all.bat (win), or flash-all.sh (mac) file run with admin privileges (right click -> run as administrator).
- You’re done!
Post-flash steps: Rooting your device
- Flash a custom recovery. I recommend using TWRP as your custom recovery. Once downloaded, move the img file to the “platform-tools” folder. To flash TWRP, boot into bootloader and use the command fastboot flash recovery FILENAME.img.
- Flash SuperSU. Download the zip file, move it to the “platform-tools” folder and boot your device into recovery using the command adb reboot recovery (or navigate to “reboot recovery” while being in bootloader).
Now, put your recovery into adb sideload mode by going to “Advanced” (in TWRP). Then, use the command adb sideload FILENAME.zip to flash SuperSU. - You’re done! You can now reboot your device.
Installing Google Experience Launcher
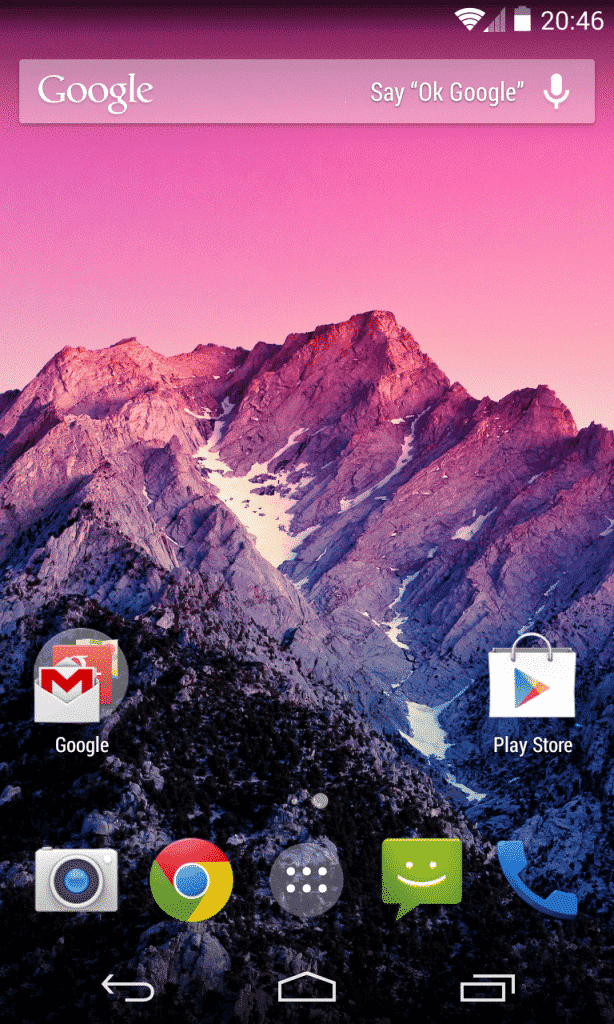
As already known, only the Nexus 5 comes naturally with the new GEL. So, if you want to try it out yourself, you can simply download and install the GEL apk. Google’s new major search update fixed some bugs people had while using GEL, especially on a Nexus 7. Thanks to that, there shouldn’t be any problems installing the launcher with the apk.
Keep in mind that, in order to get Google voice commands working, you need set your system language to English (U.S.).
Download Google Experience Launcher apk
To get an overview of the most popular launchers, check out our guide!
I hope this guide helps you flashing Android 4.4 onto your device! Have fun with KitKat and let me know if you have any questions.
Are you interested in more Android related guides?
Have a look at our Android knowledge database.
Alex Moran
I know daniel… dissapointed that the nav bar and status bar stay the same, im currently running the N5 port.
I flashed the factory image and then installed the Google Launcher. Transparent bars and Okay Google is working.
Try nova launcher beta
With Nova, the okay google command doesn’t work unfortunately
do you have transparent bars on the lockscreen? when i used AOSP 4.4 i had transparent on launcher but it was normal on lockscreen…
True, the bars aren’t transparent while in lock screen. Bummer. Guess we have to wait for a custom rom to fix that
I’m going to stick with the n5 port until OTA happens
why after the ./flash-all.sh command it says to me:
./flash-all.sh: line 17: fastboot: command not found
./flash-all.sh: line 18: fastboot: command not found
./flash-all.sh: line 20: fastboot: command not found
./flash-all.sh: line 21: fastboot: command not found
./flash-all.sh: line 23: fastboot: command not found
what can i do? pls help!!!!
Right click on flash-all.bat (not flash-all.sh) and select Run as administrator.Bring the device in Fastboot mode first (turn off and push power button and volume button at the same time) Good luck.
Try to edit the flash-all.sh file and put a ./ in front of every ‘fastboot’.
Did you ever solve this? Im stuck with the same issue! Please help…did Marc Knoll advice help, because I think i have the placement correct but this is still occurring.
AntonioGiammalvo Probably you didn’t place the factory image files into the folder where your adb and faastboot is situated: The platform-tools folder in the Android SDK folder.
Because of that, the flash-all process doesn’t find the fastboot command. Hope that fixes your problem
Hi, Marc Knoll
This guide is great, but when i come to the step where it says: 4. Let the flash-all.bat/sh file run
Im not sure what to do.
So i just have one question, after unzipping the .tgz file, what do i write to start the flashing prosess?
I dont care about loosing data, just want to flash 4.4 🙂
Marc Knoll
I found out! Just double clicked the flash-all.bat and it started doing its thing! 🙂
Thought i maybe had to write some commands to make it start, but this was to easy! 😛
Anyway, thanks for a great guide! 🙂 Now im off to som kitkat goodness 😛
Alpejohn Great! Glad my guide helped you. Enjoy 4.4!
AntonioGiammalvo: Right click on flash-all.bat (not flash-all.sh) and select Run as administrator.Bring the device in Fastboot mode first (turn off and push power button and volume button at the same time) Good luck.
The file flash-all.bat must be run with ADMINISTRATOR PRIVILEGES!!!(Right click on file and select “”Run as administrator”)
Thanks. Forgot to mention that. Post will be fixed
hi , can you help me get ride off problem
i had rooted my karbonn s5 n it successfull rooted that ok
after that i had installed various apps
superuser, cleaner etc,
and i also installed “chainfire 3d” and i had give permission to superuser to root access
and again i given the permission to chainfire 3d to root access
then my phone gone to booting
for 1 to 2 minutes
and i taken out battery
and kept again
now the phone is not opening ! ie only showing booting screen
please help me
my phone model is karbonn titanium s5 andriod version 4.1.0 jelly bean
pls help me i bought it just 5 months before
pls help me
my email id pingili.anilkumar@gmail.com
please help me
So I tried this and the command box just says waiting for device, and nothing happens. how long does this usually take?
Is your device in fast boot mode? (restart and press the button combination for your device, Nexus 6 is Power+Vol Down)
Hey I need help flashing my galaxy exhibit, I had a friend start it but have to leave. Now it say install update from zip file but idk how I can’t find what this page is telling me to…. Its saying no such file stalation aborted when I try to guess the right one, how can I just get my phone to turn on….
I realllyyy need helppp, and very limited time to internet since I don’t have my phone on and I’m on someone else’s hotspot…. Please HELP
I’m getting error=3 (Missing system.img) (Using 5.1 Lollipop update package, assuming it’s the same thing)
Putting my 2 cents here… DO NOT run flash-all.bat as administrator in Windows, all i got was a “fastboot is not recognized as an internal or external command” error (at least i think that’s what it said)
When i simply double clicked it, it worked flawlessly
I’m running Windows 7 Ultimate x64, using the generic google driver on a Nexus 7 2013 WiFi model…
cant do this… my device is already stuck in the boot loop…
How to flash stuck logo problem phones.. my phone is LYF LS-4503