How to enable G Sync?’It is simply Nvidia’s technology for matching the improvised rate of a gaming monitor to the frame rate of a video game.
Now when the frame rate running on your PC differs from the monitor’s updated rate, problems appear. When G Sync holds visual issues like these by assuring the monitor does not refresh faster or slower than the game’s frame rate, then the conversation starts. We are here to help you to update you about the way to enable G Sync.
Here we go!
Table of Contents
How to Enable G Sync on Your Pc?
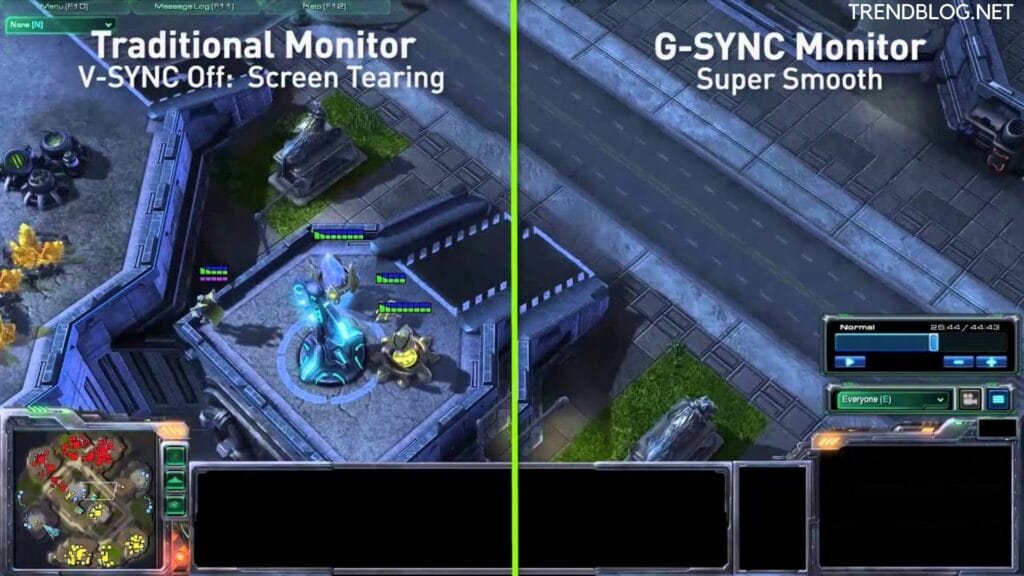
When we talk about NVIDIA G Sync, it is a technology licensed out by the GPU maker to companies making displays the best monitors and laptop displays. We can say it is a communication between the monitor and GPU for providing silky-smooth, tear-free gaming.
The display takes every frame resulting from the GPU, and this variable refresh rate assure no hurdles during gameplay. As soon installed drivers once for your NVIDIA GPU, you do not have to bother to install additional software for the services provided.
Ok, let’s go through the steps to enable G sync on PC:
- First Select the NVIDIA Control panel after right click on your desktop.
- Now expand the display item in the sidebar there.
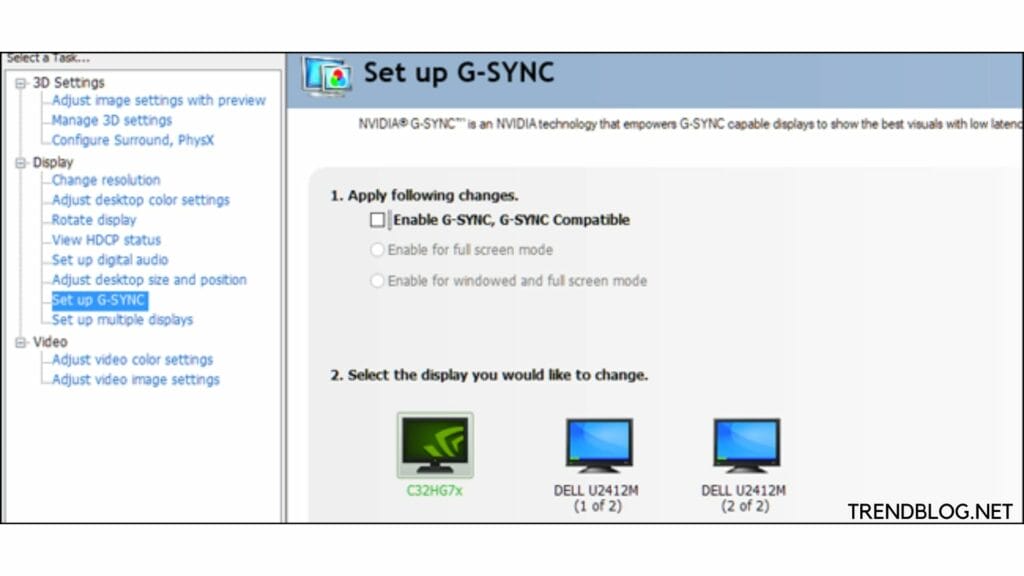
- Tap on the Setup G Sync.
- Then select the box beside Enable G Sync.
- Beneath this select whether you want G Sync enabled for only full screen or full screen and window modes.
How Can We Use G Sync in Our Pc Games?
If you want to use G Sync in your games, you just need to set your monitor as your main display in this same control panel in case you are using more than one monitor.
Follow the steps for the same>
- On the same window as mentioned above tap on Set up multiple displays.
- Now make sure that the G Sync monitor is in the right location and highlighted as the main display.
- In case you have to make it your main display then do as mentioned down.
- Start with the Windows 10 Settings app.
- select System.
- Then tap on Display.
- Now highlight the box following the display in question there.
- Then go down and check the box beside Make this my primary display.
So, now you are getting a flawless game with the tear-free onscreen action. enjoy!
Also Read:
Delete Microsoft Account in 5 Easy Simple Steps
5 Reasons Why You Need To Consider VPN For Netflix
How to Withdraw Money From Coin Base
How To Distribute Internal Resources In Preparation For The Exam?
Which GPUs Are Supported?
As we know now Nvidia is enabling G Sync for variable refresh rate monitors on GTX 10-Series and RTX 20-Series graphics cards. In case you are running an older GPU, you are the odd one out. You must connect your graphics card to your monitor via a Display port.
How Well Does It Work?
It‘s really surprising, how well GSync works is largely going to come down to what settings you’re using in your games and what monitor you’re using it with depends on that. We always got positive feedback with G Sync enabled on a GSync Compatible monitor.
When you are playing a game with such high settings that you cannot consistently keep your frame rate within the monitor variable refresh rate range, then it’s a problem for you. As your game runs within that variable refresh rate range
Now if you are planning to start gaming with G Sync on a Free Sync monitor, these are all that you need to know and what you can get.
Which variable refresh monitors can support G Sync?
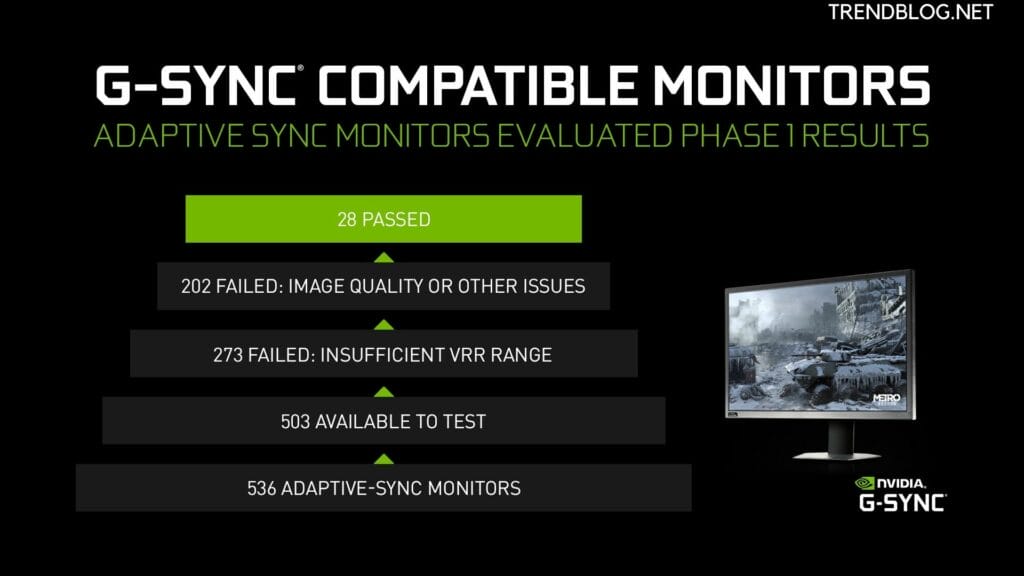
Now monitors that have got this designation passed tests assuring that they offered large variable refresh rate ranges greater than 2.4:1 (where most offer at least 48-144Hz), so in that case, the window is wide enough in between the lowest and highest refresh rate for gamers to get benefitted. Even they also ensure the monitors don’t blank, pulse, flicker, ghost or present other artefacts with G Sync enabled.
Right now, G-Sync Compatible designation has been covered by 12 monitors:
- Acer XFA240
- Acer XG270HU
- Acer XV273K
- Acer XZ321Q etc.
Even when your variable refresh rate monitor was not listed, still you can enable G Sync. Problems will arrive but you have to choose by options.
How to Use G Sync on a Free Sync Monitor?
In case your monitor is one of the G Sync Compatible models, then it’s good news for you as G Sync must enable itself automatically. Now if it is not then you can easily do it by the following steps:
- Go to Nvidia Control Panel
- Fetch ‘Display: Set up G-SYNC
- Tap ‘Enable G SYNC Compatible’ and choose the correct option
- Now choose your monitor
- Select ‘Enable settings for the selected display model’
- Now click on Apply! that’s it.
As of now, you know how to enable g sync and how to choose your main monitor in focus. Let us know the info you liked the most.


Comments are closed.