You can save and share important information quickly and easily by taking screenshots on your Mac. But it can be a pain when the screenshot option doesn’t work right. Don’t worry if you can’t get a picture to show up on your Mac.
In this full help guide, we’ll look at different ways to figure out what’s wrong and fix it. Even if you know a lot about Macs, these steps will help you get screenshots working again in no time.
Table of Contents
What is the Mac Screenshot Functionality?
Before we talk about how to fix problems, let’s learn more about how the screenshot function on a Mac works. There are different ways to take a picture on a Mac. Most people record the whole screen, part of the screen, or a window.
By default, there is a key on the computer for each type of picture in macOS. Most of the time, you need to press Command, Shift, and a number or letter at the same time.
But if you have trouble with the screenshot function, it could be because of your system settings, a conflict between apps, or a problem with your hardware.
How to Fix the Mac Screenshot Issues?
When you take a picture on your Mac, a lot of things could go wrong. Find out what’s wrong with something so you can figure out how to fix it. The following are some of the most common reasons why Macs can’t take screenshots:
- Keyboard commands or shift keys that don’t work
- Mac OS that is no longer supported
- The settings for taking photos were wrong.
- Third-party programs or add-ons that don’t work well together
- Bugged or otherwise broken software
- issues with the hardware
Now that we know what could be wrong, let’s look at how to fix the problem of Mac screenshots not working.
Method 1: Check the Shortcuts and Modifier Keys on Your Keyboard
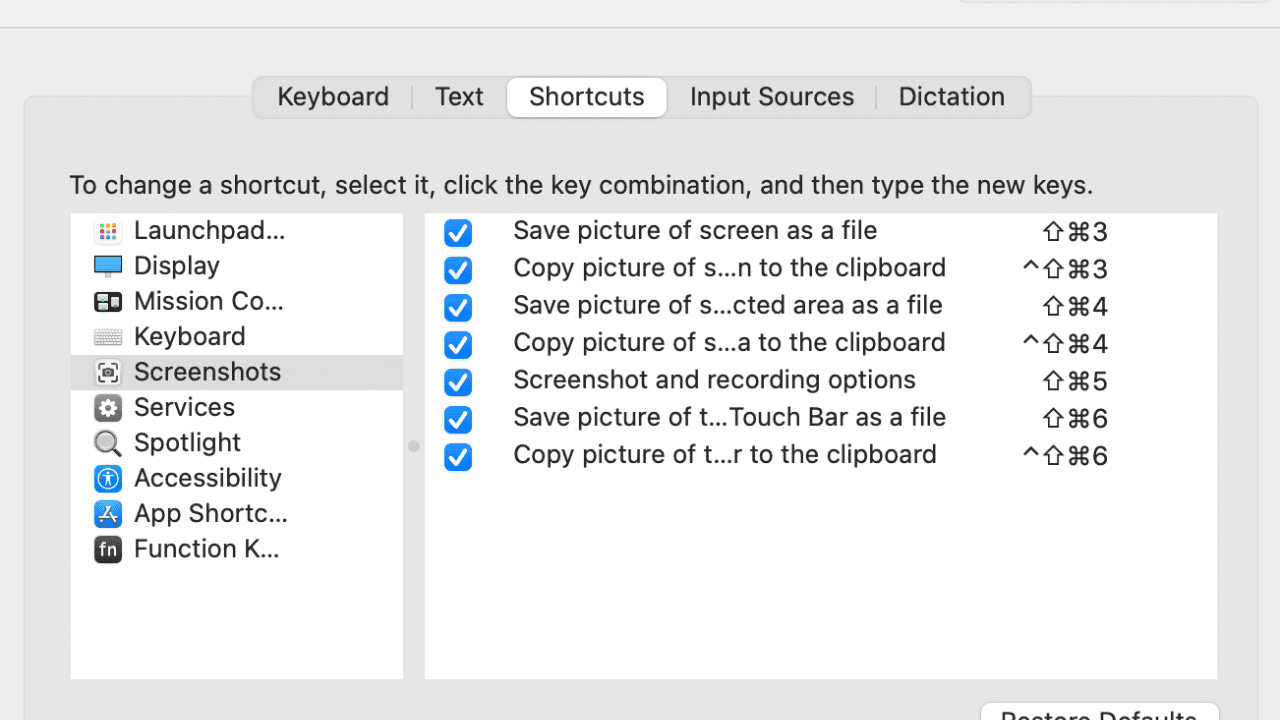
When the screenshot function doesn’t work as expected, one of the most common reasons is that the computer buttons or modifier keys are set up wrong. Follow these steps to make sure the key combos are right:
- Click the Apple button in the top left corner of the screen to go to System Preferences.
- Click on the Keyboard tab, and then click on the Shortcuts tab.
- Choose Screen Shots from the list on the left.
- Make sure that the keyboard keys for taking different kinds of screenshots work.
If the shortcuts you’ve been given are wrong or get in the way of other tasks, you can click on the shortcut and make a different key combination. Make sure the keys you choose can’t be used as buttons already.
Method 2: Update macOS to the Latest Version
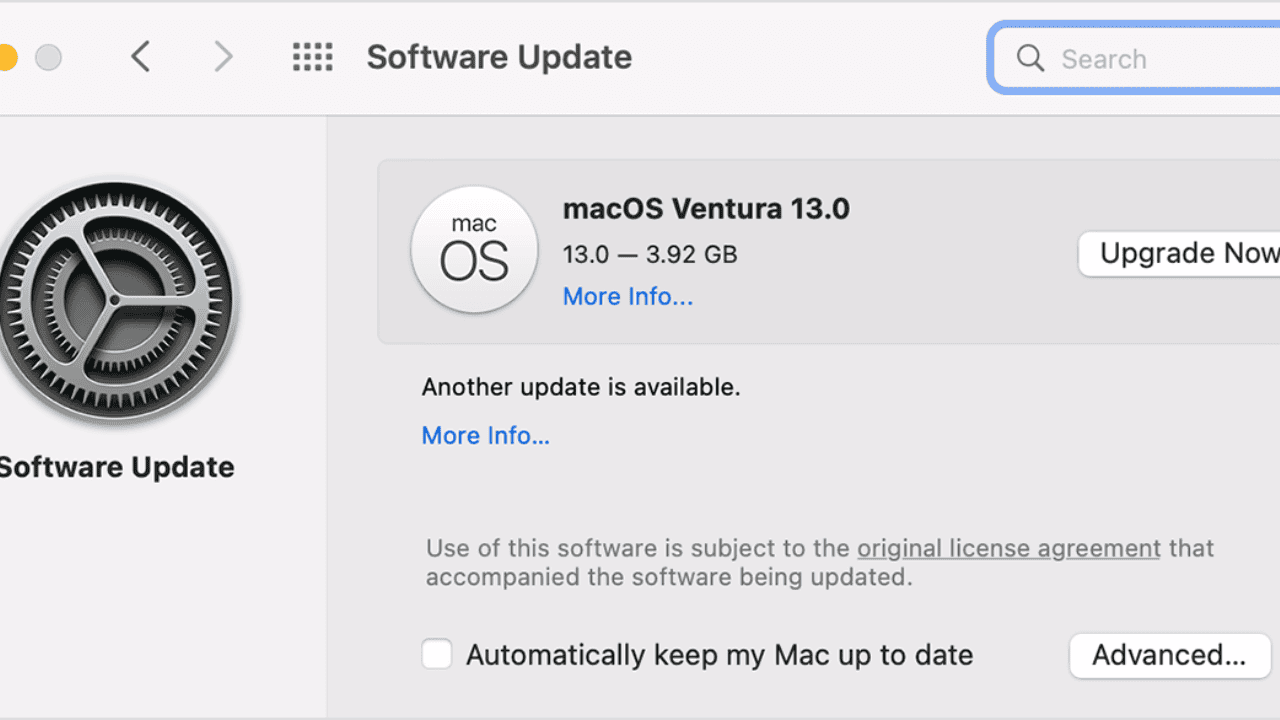
Keep your macOS updated for the best speed and bug fixes. Apple often puts out updates that fix known bugs and make the system safer. If the screenshot feature isn’t working right, these changes can fix it. To keep your Mac OS up-to-date, do these things:
- Click on the Apple menu in the upper left area of the screen.
- Choose System Preferences from the menu that drops down.
- Click the Software Update button in the System Preferences window.
- Click the Update Now button if there is a new version.
- Let your Mac download and run the update.
- After the update is done, your Mac will need to be turned back on.
After restarting your Mac, try taking a screenshot to see if the problem is still there. When you update macOS, it can often fix interface problems and other known problems.
Method 3: Reset Screenshot Preferences
If your Mac’s options for taking screenshots are broken or wrong, you can fix the problem by putting them back to how they were before. Do the following to change the settings for taking screenshots:
- On your Mac, open the Terminal app.
- You can look in the Utilities folder in the Applications folder or use Spotlight to find it.
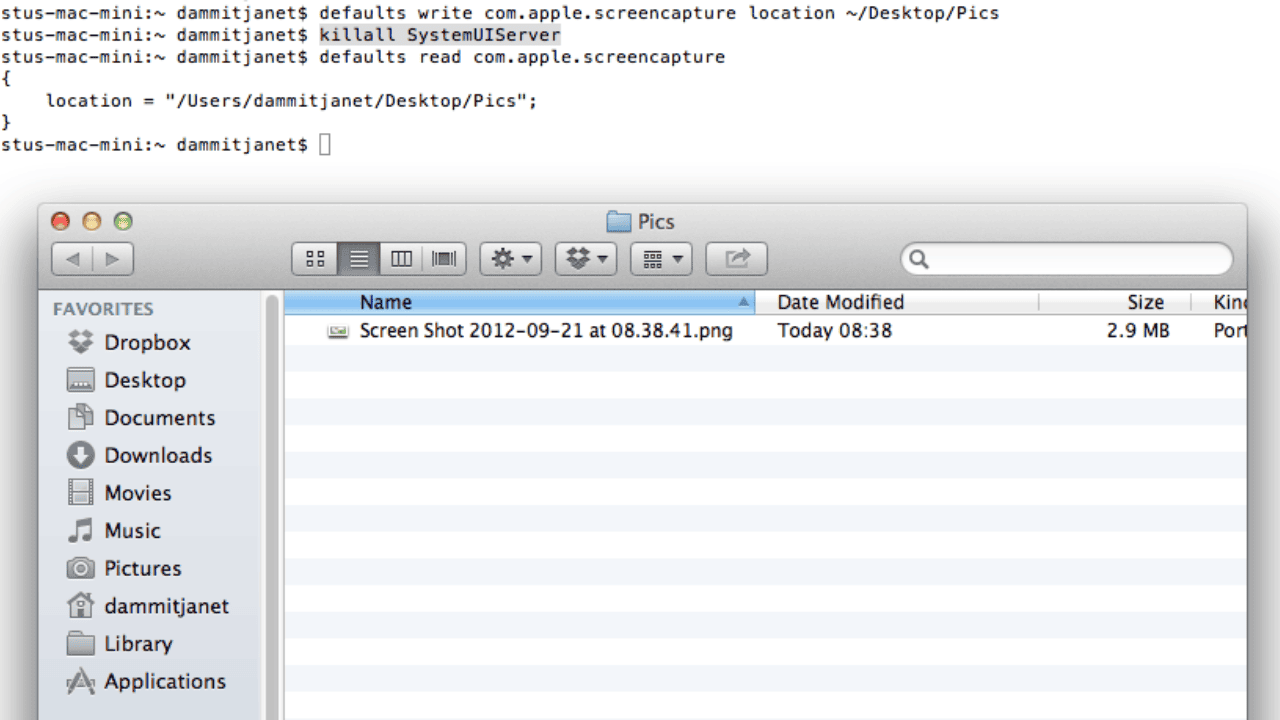
- Type the following instructions into the Terminal window and press Enter:
defaults delete com.apple.screencapture
- After you run the code, your Mac will need to be turned back on.
When you restart, the screenshot choices will go back to how they were before. Take a picture to check if the problem is still there or if it has been fixed.
Method 4: Use Third-party Tools to Take a Screenshot
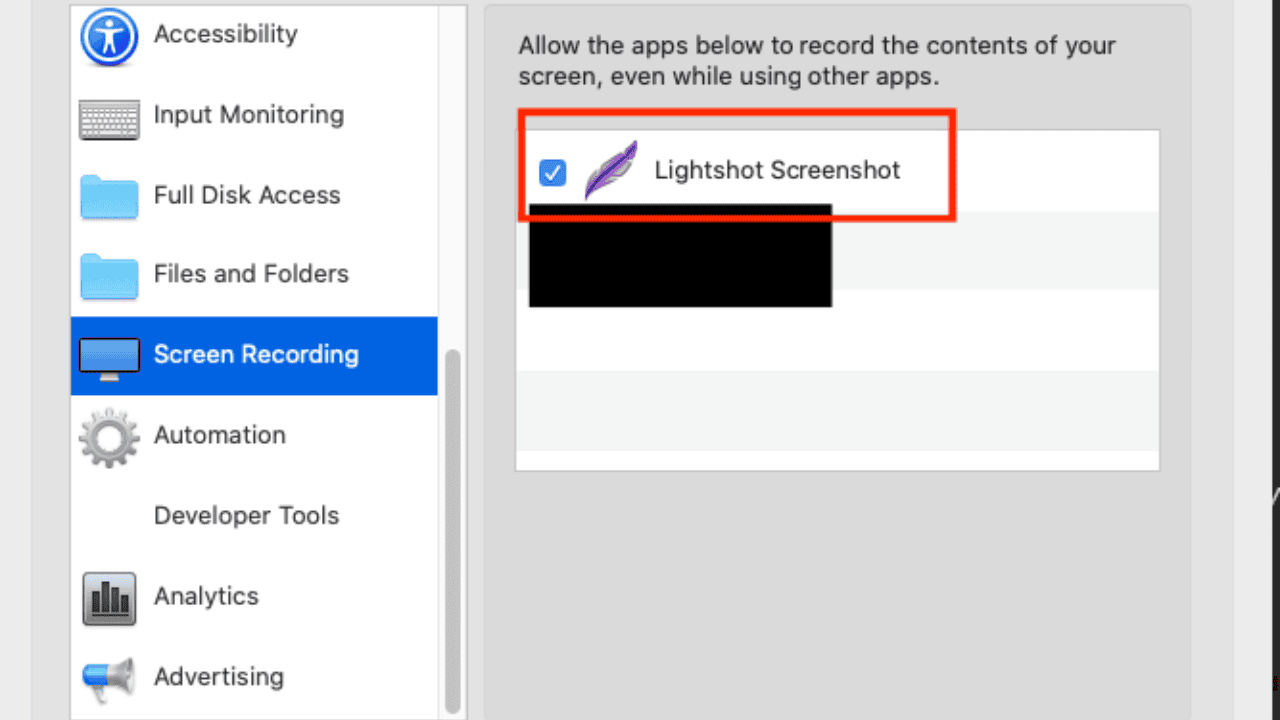
If the built-in picture function keeps giving you trouble, you might want to try a third-party tool instead. Most of the time, you can add extra features to these tools and change how they work. Snagit, Skitch, and LightShot are well-known third-party tools for Mac that let you take pictures.
Visit their websites to find the tool that works best for you, then download and install it.
Once the third-party tool is opened, you can follow the steps it gives to take screenshots on your Mac. Most of these tools have easy-to-use interfaces and different screenshot choices, so you can take pictures of the whole screen, a specific area, or just one window.
5. Reset the NVRAM or PRAM
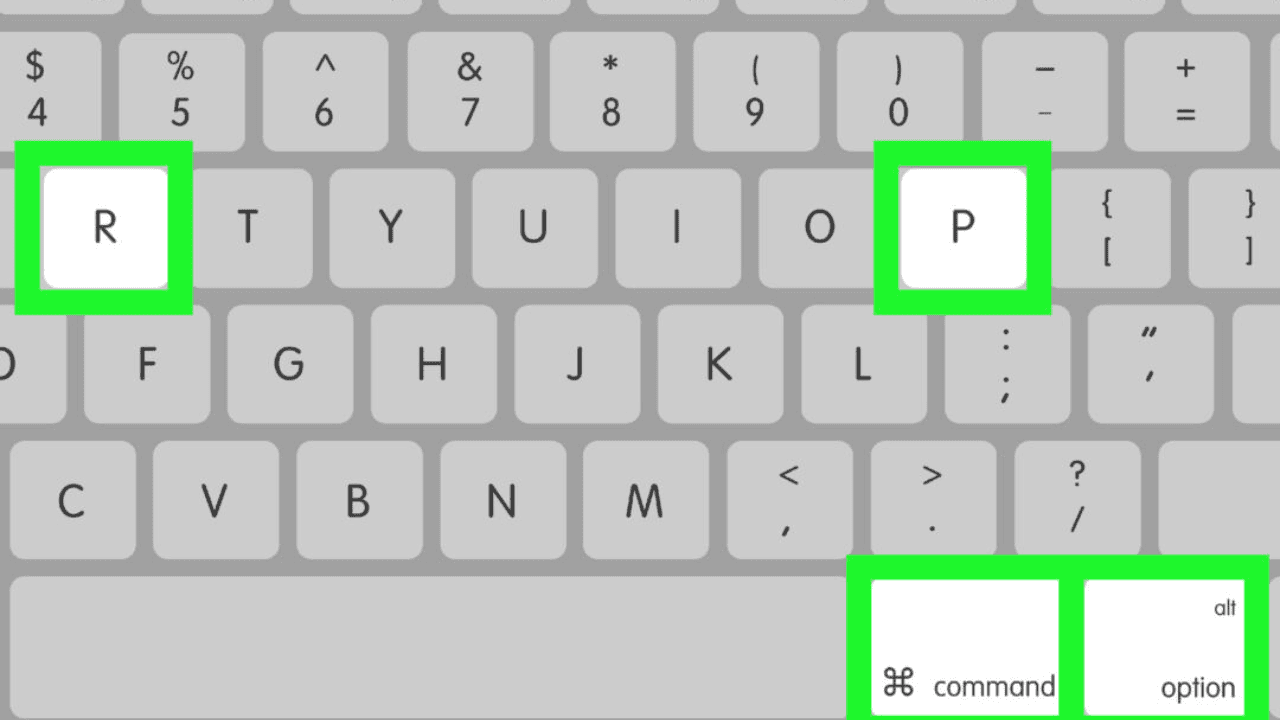
Resetting the Non-Volatile Random Access Memory (NVRAM) or the Parameter Random Access Memory (PRAM) can fix some hardware problems, like the ones with the picture function. To reset your Mac’s NVRAM or PRAM, do the following:
- Shut down your Mac.
- Press and hold the Power button, then press and hold Option, Command, P, and R to turn it on.
- Press and Hold on the keys for about 20 seconds, or until you hear the sound of starting up again.
- Put the keys down and let your Mac start up again.
- After restarting the NVRAM or PRAM, test the picture function to see if it is working correctly.
Method 6: Turn Off Third-party Extensions and Applications
It can be hard to take pictures on a Mac when third-party tools or apps don’t work well together. You can figure out what’s wrong and fix it by turning off or removing any new tools or apps that could be causing the problem. What you should do is:
- Use the Apple menu to get to System Preferences.
- Choose extensions.
- Turn off any add-ons from third parties that allow you to take screenshots.
- Try turning your Mac back on to see if the problem is still there.
Method 7: Turn Off the Conflicting Apps
If turning off extensions doesn’t fix the problem, you might need to uninstall newly installed programs that could be causing problems. Do these things to get rid of them from your Mac:
- Open the area of your Mac where your apps are.
- Find out which program is causing problems.
- You can drag the app to the Trash or right-click it and select “Move to Trash.”
- To finish the job, empty the trash.
After getting rid of the tools or apps that were causing the problem, try taking a screenshot to see if the problem is gone.
Conclusion
Taking screenshots on your Mac can help you get things done and communicate with other people. The steps in this piece should help you figure out what’s wrong with the screenshot function on your Mac and fix it.
Remember to check your keyboard shortcuts, update your macOS, reset your screenshot settings, think about using third-party tools, reset your NVRAM or PRAM, turn off extensions or apps that are causing problems, do a Safe Boot, fix your disk rights, if all else fails, call a pro.
By using these methods and taking the right steps, you can fix a Mac that won’t take screenshots so that you can easily capture and share important information. To read more content like this, visit https://www.trendblog.net.


