

When Windows updates aren’t downloaded, an update error 0x80245006 might lead to a lot of problems.
In addition to your system becoming vulnerable, you can also miss out on new features that Microsoft is working on for Windows 10.
Thus, how can one resolve Windows 10’s update problem 0x80245006? Let’s investigate!
Table of Contents
How Can I Resolve the 0x80245006 Update Error?
Take the actions listed below to resolve Update installation encountered some issues, but we’ll give it another go later. If this keeps happening to you and you would like more information, try searching the internet or contacting support: (0x80245006) mistakes:
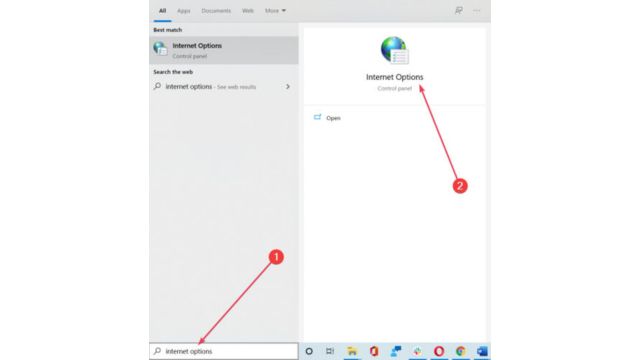
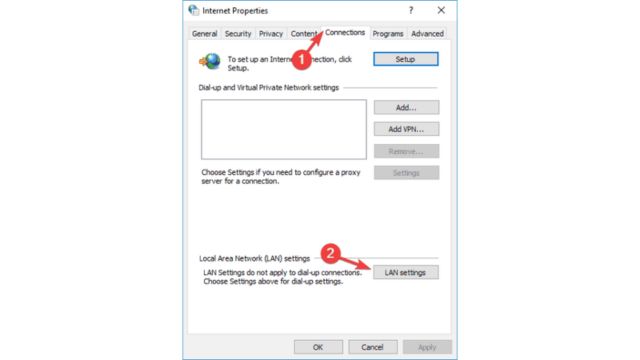
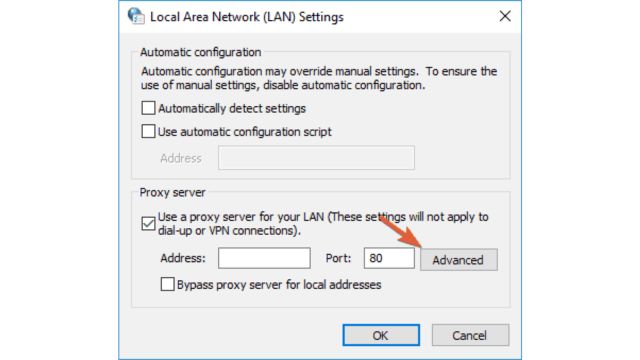
1. Check your proxy settings
- Look for internet options, then pick one from the list of results
- After selecting the Connections tab, select LAN Settings.
- Click Advanced
- Find the input field that states “Do not use proxy server for addresses beginning with” and type the following addresses into it:
.windowsupdate.com;
.microsoft.com;
.windows.com;
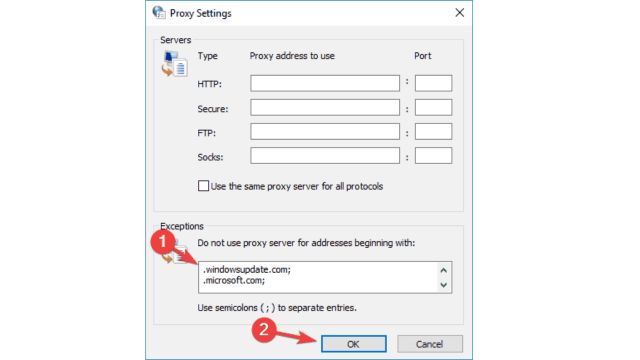
Save the modifications you made. Before the modifications take effect, your computer may need to be restarted.
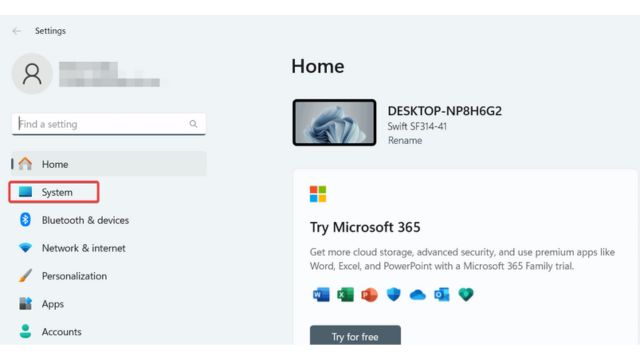
2. Consider Using the Windows Update Troubleshooter
- In the Start bar, type Settings
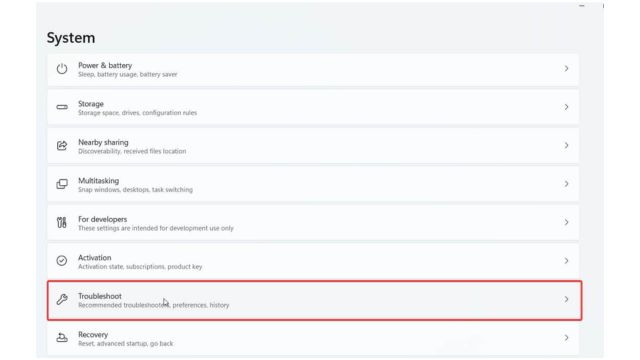
- Access the System
- Select Troubleshoot
- Choose Other Troubleshooters

- Go to Most frequent, choose Windows Update, then click Run.
Error 0x80245006 was encountered by numerous customers when attempting to get Windows updates. This issue may make it impossible for you to obtain any updates, leaving your computer vulnerable.
Nevertheless, the Windows Update troubleshooter may help you resolve the issue.
3. Verify That The Required Services are Operating
- Press Windows Key + R to open services.msc. Click OK or hit Enter now.
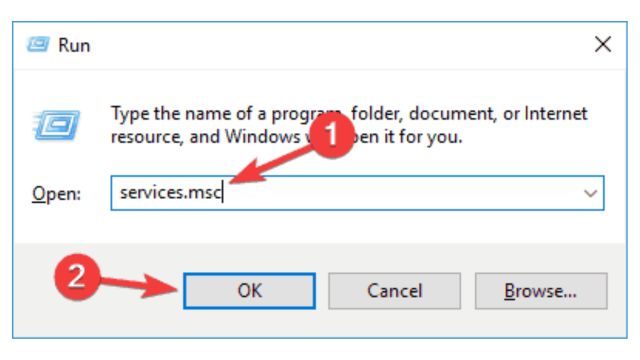
- Find and verify the status of Background Intelligent Transfer Service. Right-click the service and select Start from the menu if its state isn’t set to Running.
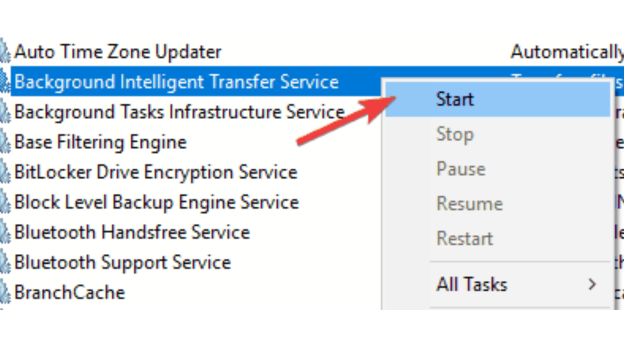
- For the Workstation and Windows Update services, repeat the preceding procedure. Once that’s done, shut down the Services window.
4. Using Command Prompt, Disable Specific Services
- To open the Command Prompt, type cmd into the search bar and select Run as administrator
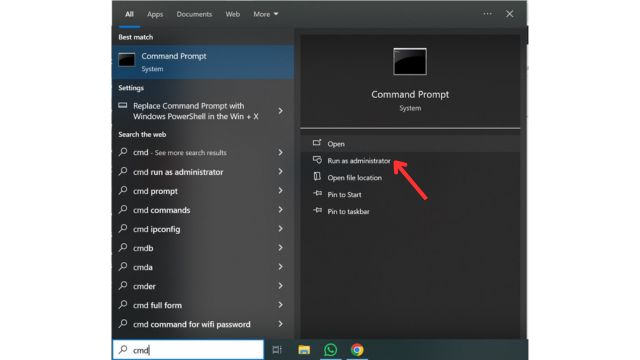
- Type the following commands in:
net stop wuauserv

net stop cryptSvc

net stop bits

net stop msiserver

ren C:WindowsSoftwareDistribution SoftwareDistribution.old

ren C:WindowsSystem32catroot2 catroot2.old

net start wuauserv

net start cryptSvc

net start bits

net start msiserver

pause
Close Command Prompt and restart your computer once all of the commands have been completed. Once the computer has restarted, see if the issue has been fixed. Make sure to give this a try as many customers have stated that it resolved their issue.
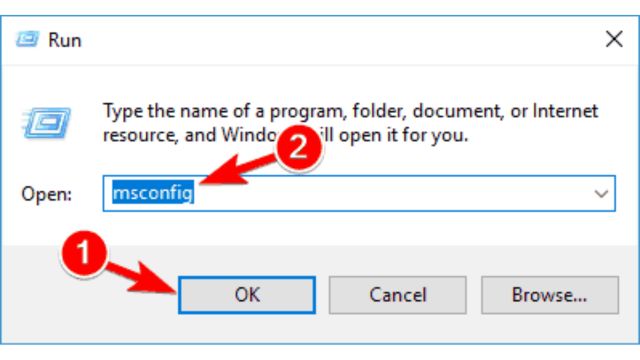
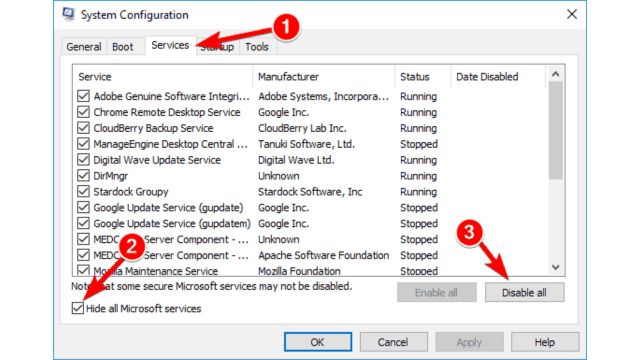
5. Run a clean Boot
- To enter msconfig, press Windows Key + R. Then, hit Enter or click OK.
- Select the option to “Hide all Microsoft services” under the Services menu. Select Disable all now.
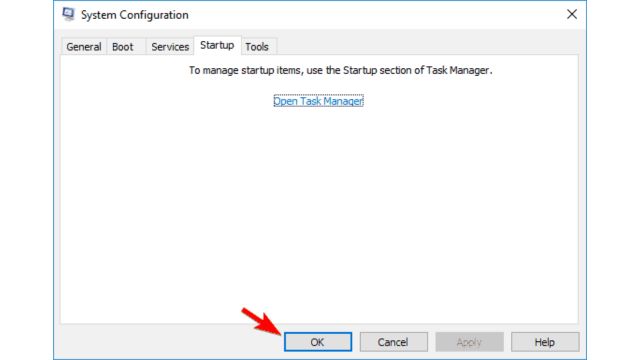
- Select “Open Task Manager” from the Startup tab.

- Select Disable from the menu by doing a right-click on the first item in the list. For each startup application on the list, repeat these steps.
- Go back to the System Configuration window after quitting Task Manager. To save the changes and restart your computer, click Apply and OK.
- You should think about uninstalling any recently installed apps and see if that fixes the issue if Clean Boot is unable to assist.
6. Remove AdFender Software
AdFender is a system-wide adblocking program that removes advertisements from Microsoft Edge. Despite the tool’s impressive sound, users have found that it has one significant shortcoming.
Users claim that AdFender will prevent Windows updates.
Because of this, if you have AdFender installed, the only way to fix the 0x80245006 update issue is to uninstall it.
7. Conduct DISM and SFC Scans
7.1 Perform a SFC scan
- Open the Command Prompt as indicated in the sixth solution.
- To run the command, enter sfc /scannow and hit Enter.
- Don’t interrupt this procedure as it may take up to fifteen minutes.
- After the scan is complete, see if the issue persists.
7.2 Run a DISM scan
- As an administrator, open Command Prompt.
- Enter the subsequent command now, then hit Enter.
- Make sure not to interrupt the scan as it may take up to 20 minutes.
Check to see if the issue has been fixed after the DISM scan is complete. Make sure to run the SFC scan again and see if it resolves the issue if it still doesn’t go away or if you were unable to run one earlier.
Facing the 0x80245006 error in your window? Don’t worry, you can fix it! Follow our guide to troubleshoot the issue and get your updates working again. Stay tuned with Trendblog to get the solution of every error.