

Typing is hard work, especially if you use a computer keyboard for a living. No wonder many typists eventually end up with carpal tunnel syndrome. So as voice dictation has improved by leaps and bounds, so has its popularity amongst users. As well as the industry-favourite Dragon, MacOS dictation is also really great to use.
Obviously you need a good microphone, as well as a clear voice. Strong accents and dialects can cause problems, especially for my Scottish accent, so speaking slowly is a must.
Table of Contents
Setting Up MacOS Dictation
There really isn’t a lot of “setting up” to do, as the MacOS dictation feature is already baked into the operating system. But you do need to switch it on, as well as a few housekeeping tasks.
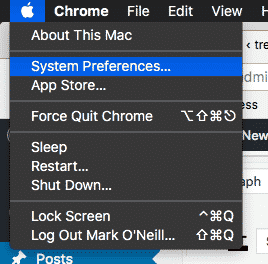
First, go to System Preferences.
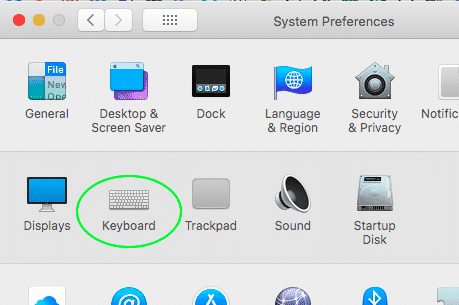
Then in the settings window, choose Keyboard.
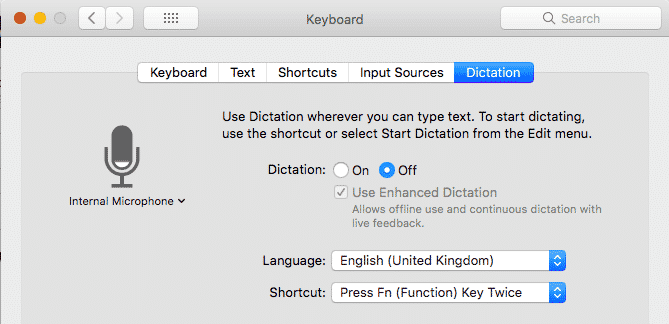
Then the Dictation tab.
Now let’s look at each thing in turn.
Switching MacOS Dictation On
This one is pretty obvious. Click “On” to turn it on. I would recommend however that when you are not using it, you leave it switched off. This is because it is easy to accidentally activate it when you don’t mean to, and it is simple to switch back on when you DO need it.
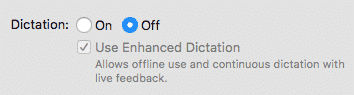
What Is “Enhanced Dictation”?
If Enhanced Dictation is not switched on, OS X transmits a recording of your dictation to Apple’s servers for processing. A few seconds later, the dictated text appears in your document. This means there is a slight lag before you see your text. If you are trying to get a document done quickly, that lag can quickly become annoying. Especially if you look back and notice a typo or two in the last paragraph.
With Enhanced Dictation enabled, you don’t have to wait for your dictation to be processed by Apple servers. This is because the dictation transcription is handled locally. This means there is no lag whatsoever, and your dictation will appear on the screen live and in real time.
So in other words, switch it on. There’s no reason not to.
When you switch the “Use Enhanced Dictation” option on for the first time, it will download and install a 800MB file, containing essential components. Then you’re good to go.
Choose Your Audio Device
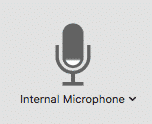
Most people will probably use the internal microphone in their Mac for dictation. But some, including myself, also have an external USB microphone which can pick up better sound. If you have one too, by plugging it in, you can drop down the menu and choose the right audio device.
Pick Your Language & Dialect
![]()
Now you have to pick your language and dialect. Dialects are only available for some languages and not for others. For example, Italian is Italian and Turkish is Turkish. But other languages – especially English, German, and French – have various dialects you can choose from.
Drop down the menu by clicking the blue arrows on the right, and you will see a “Customize” option. Then you will see this:
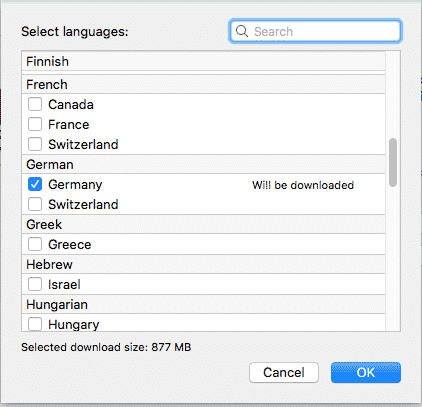
This is all of the languages available from Apple. You simply choose the ones you want by ticking them, and the language packs will be downloaded. Untick the ones you don’t need to keep things tidy.
As you can see in the French and German section, there are different dialects to choose from. Although curiously, there is not an option for Austrian German.
Choose a Shortcut To Activate MacOS Dictation
![]()
This is vitally important, as you don’t want to choose anything which you are likely to activate accidentally.
I personally use the one above – pressing the Function key twice – but there are other options if you drop the menu. If you don’t like one of the ones on offer, you can specify one of your own.

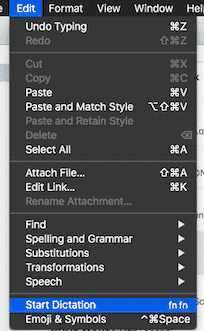
If you choose to switch the shortcut off, you can access dictation from the Edit menu. But a shortcut is so much easier.
Required Keyword Phrase
If you have enabled MacOS dictation, you should now see a small microphone in the top right of your screen, next to your clock. Clicking on that will reveal something called the “Required Keyword Phrase“.

This is where you don’t even use the keyboard shortcut or the menu option. Instead, your computer listens out for you saying the word “computer” and then it dictates what you say from then on.
However, as you can imagine, everytime you say “computer” in another context, you’ll be switching dictation on all the time. So there is the potential for chaos here. For that reason, keep it switched off unless you really need to have it.
However, if you are a Trekkie, this will put you in Trekkie heaven.

Testing The MacOS Dictation Feature
Now that everything has been set up, let’s now test it out to see how accurate it is.
Open up a word processing application (Notes, TextEdit, Pages, Google Docs….) then open MacOS Dictation by whatever method you chose in the settings. A small microphone will now pop up on the screen.

If you have more than one language pack installed, clicking on the language (or country) will give you the option to seamlessly switch languages.
Also bear in mind that as soon as that microphone pops up, it is now listening for something to transcribe. When you are finished dictating, press “Done“.
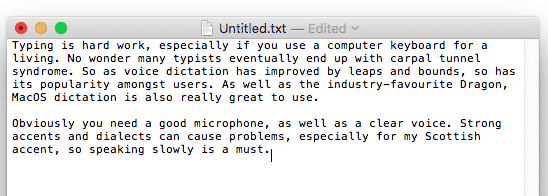
I started to dictate the start of this article, and it was 100% perfect.
Conclusion
Voice dictation is not for everyone as it requires you to think fast on your feet. Otherwise you will spend all of your time editing out all the ehms and errs.
But if you can train yourself to use dictation quickly and effectively, you will not only save heaps of time, but your hands, wrists, and arms will thank you too.
Comments are closed.