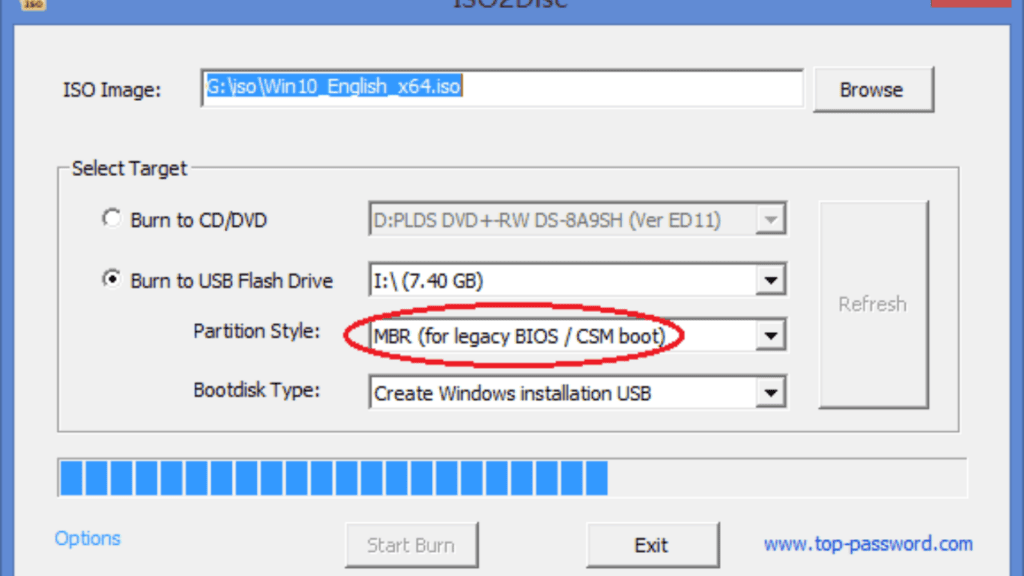
Windows 10 from USB with UEFI support, A UEFI-based PC can have Windows 10 installed on it. Make use of these resources to make a USB flash drive that will work for your needs. It is common practise to utilise a USB flash drive to initiate the “Windows Setup” wizard while installing a clean copy of Windows 10. If your device uses the newer Unified Extensible Firmware Interface (UEFI) instead of the older Basic Input/Output System (BIOS), you must use the appropriate installation disc for the UEFI version in order to get everything up and running.
Table of Contents
How to Create Windows 10 From USB With UEFI Support
In Windows 10, you have a couple of options for making USB flash drives. In order to get the files onto a USB flash drive that is compatible with both firmware versions, you can utilise the Microsoft Media Creation Tool (UEFI and legacy BIOS). You can also use Rufus, a third-party utility that simplifies the process of making a USB flash drive bootable in UEFI mode, to install Windows. Following the instructions in this guide will allow you to create a Windows 10 UEFI-compatible USB flash drive using the Microsoft Media Creation Tool and Rufus.
Method 1: Windows 10 From USB With UEFI Support With Media Creation Tool
To upgrade to Windows 10 or perform a clean install, the Media Creation Tool is your best bet for making bootable USB media. Connect a flash drive with 8GB of capacity or more, and follow these instructions to make a Windows 10 USB installation drive:
- Start the Windows 10 installer.
- To save the file, use the Download tool now option found in the “Create Windows 10 installation media” section.
- Start the installation process by double-clicking the MediaCreationToolxxxx.exe file.
- To accept the licence agreement, use the Accept button.
- You can make installation media (a USB drive, DVD, or ISO file) to use on another computer by clicking the corresponding button.
- All you have to do is hit the Next button. (Optional) Turn off the setting that says, “Use the recommended options for this PC.”
- Windows 10: Pick the Right Language, Architecture, and Edition (if applicable).
- The quick suggestion here is to use the “Architecture” drop-down menu and choose the Both option if you intend to use the same Windows installation disc for numerous computers with either 32-bit or 64-bit architectures.
- You can proceed by clicking the Next button.
- If you want to use a USB disc, that’s a possibility.
- You can proceed by clicking the Next button.
- A list of available flash drives will appear; choose one to use. (Hit “Refresh drive list” if you don’t see the drive.)
- Just hit the Next button.
- To complete, select the Finish button.
The Media Creation Tool will get you set up to install Windows 10 on any machine that has UEFI or BIOS support by downloading the necessary files and formatting a USB drive.
Method 2: Create Windows 10 UEFI Boot Media With Rufus
Rufus is a well-known free third-party tool that can be used in place of the Media Creation Tool to make installation media that is compatible with UEFI machines. Using an existing ISO file or downloading the image from Microsoft servers, the programme provides two options for creating the installation media.
Create flash drive with existing Windows 10 ISO
Connect a flash drive with at least 8 GB of storage space, and follow these instructions to build a USB media using an existing Windows 10 ISO file:
- Start the Rufus download.
- Access the most recent version by clicking the first link in the “Download” section.
- Simply double-click the Rufus-x.xx.exe file to get started.
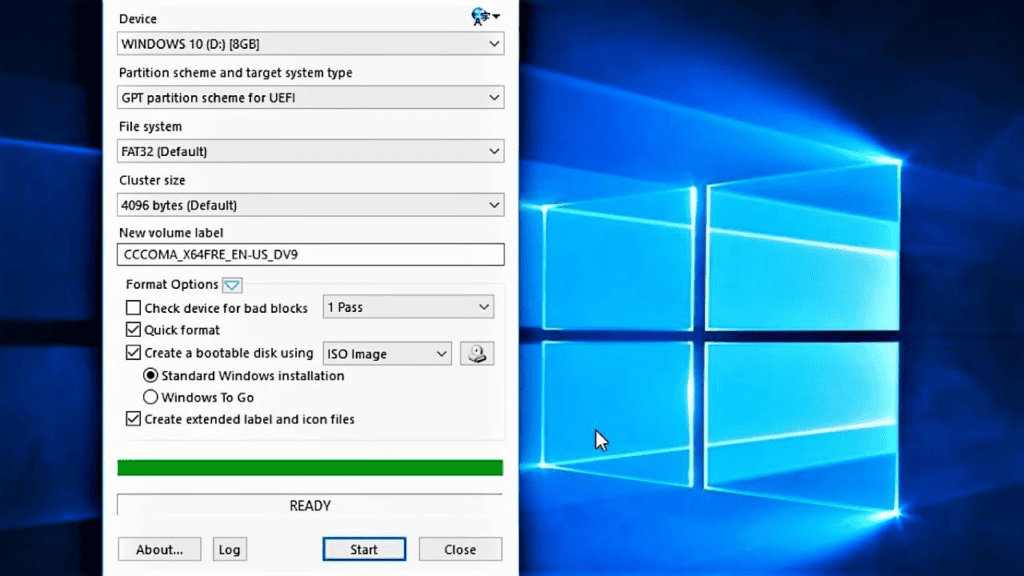
- Navigate to the “Device” menu and pick your USB drive.
- Select the boot configuration you want to use by clicking the button to the right of “Boot selection.”
- Choose the ISO file for Windows 10 from the appropriate folder. Choose the Open menu item.
- Select “Standard Windows installation” from the “Image choice” menu.
- Select the GPT partition scheme from the “Partition scheme” menu.
- Choose UEFI (non CSM) from the “Target system” drop-down menu.
- Do not modify the defaults in the “Show Advanced drive properties” section (unless you know what you are doing).
- Confirm the drive’s name in the “Volume label” field, such as “Windows 10 USB.”
- The “File system” and “Cluster size” settings should remain as they are.
- To view other formatting choices, select this option.
- Select “Quick” when asked to choose a format type.
- The option to “Create extended label and icon files” should be activated.
- Initiate the procedure by selecting the appropriate button.
- Keep your eyes out for installation customization settings, and don’t check them.
- Simply confirm by clicking the OK button.
- Forget about this window and hit the X.
The following instructions will show you how to use Rufus to make a bootable USB drive for installing Windows 10 on a UEFI-based system.
Create flash drive downloading Windows 10 ISO
The tool also has a feature to download the Windows 10 ISO file, which you can then use to create a USB flash drive to install Windows 10. To create an install media with UEFI support with Rufus, use these steps:
- Start the Rufus download. Click the first link under “Download” to download the most recent version of the tool.
- Simply double-click the Rufus-x.xx.exe file to get started. To change the preferences, use the Settings link.
- Use the “Check for updates” drop-down menu in the “Settings” section and choose the “Daily” option. Click the Close button.
- Stop using the Rufus programme. Restart the programme by double-clicking the Rufus-x.xx.exe file.
- Go to “Device” and pick your USB disc.
- Select the Download option under “Boot selection,” then click the arrow button next to “Select.” Use the download button.
- Select Windows 10 from the “Version” menu. If you want to keep going, just hit the Next button.
- To get the Windows 10 November 2021 Update, go to the Updates tab and click the 21H2 (Build 19044.xxx – xxxx.xx) option. Follow the prompts by selecting the Next button.
- Choose Windows 10 Home, Pro, or Education from the “Edition” drop-down menu. Follow the prompts by selecting the Next button.
- Select the language you wish to use during the installation process from the “Language” menu. Important: If you’re in the United States, choose the “English” option. If you don’t speak English as your native tongue, choose “English International” as your language.
- Follow the prompts by selecting the Next button.
- To choose between 32-bit and 64-bit support, click the “Architecture” drop-down menu (recommended).
- You may quickly determine whether your computer is 64-bit or 32-bit by going to the Settings menu, selecting System, and then clicking About. The “System type” will then be displayed under the Device specifications.
- Use the download button. Decide where you’d like to store the ISO image. Choose the Save option.
- Select “Standard Windows installation” from the “Image choice” menu. Select the GPT partition scheme from the “Partition scheme” menu. Choose UEFI (non CSM) from the “Target system” drop-down menu.
- Do not alter the defaults in the “Show Advanced drive properties” section.
- Select a label for the bootable device under “Volume label,” such as “Windows 10 USB.” Do not alter the settings under “File system” and “Cluster size.”
- Select the box labelled “Show in-depth formatting choices.” Select “Quick” when asked to choose a format type.
- The option to “Create extended label and icon files” should be activated. Initiate the procedure by selecting the appropriate button. Simply select the OK option. Forget about this window and hit the X.
Following your successful completion of the procedures, Rufus will launch the script that will automatically download Windows 10 ISO from Microsoft’s servers. Then, you won’t need the Media Creation Tool to make bootable media for installing Windows 10 on a UEFI machine. The UEFI-compatible USB boot disc can be used to initiate either a clean installation of Windows 10 or an upgrade to the current version.
Conclusion:
In order to boot into the setup, you will need to temporarily disable secure boot in the motherboard firmware because the “UEFI:NTFS bootloader” does not have a digital signature for secure boot. This is typically done via the UEFI, which may be accessed by pressing a function key (F1, F2, F3, F10, or F12) or Esc or Delete immediately after booting the computer.
Each manufacturer and even each gadget model has their own unique set of firmware options. So, if you need more detailed guidance, you should look at the manufacturer’s help page for your device. The secure boot option will be available once Windows 10 has been installed.
Also Read:
Stop automatic updates on Windows 10
Photos app video editor on Windows 10
How to run Android apps on any Windows 11
How to install Windows on new SSD after previous SSD
FAQs:
Q1: Can I boot from USB in UEFI mode?
The hard drive’s hardware has to support UEFI in order to boot from USB in UEFI mode. Verifying that your system disc is in GPT format is a must. If not, you’ll need to switch the disc format from MBR to GPT.
Q2: How do I boot Windows from USB UEFI?
Put the USB drive you made into the computer you wish to start up. To boot from the USB drive, turn on the device and select that option from the UEFI boot menu. Factory OS should load when the device is turned on.
Q3: What is the difference between UEFI and BIOS?
Unlike BIOS, which tops out at 2.2 terabytes, UEFI allows for drives of up to 9 zettabytes in size. The boot process is sped up with UEFI. In contrast to UEFI’s discrete driver support, BIOS stores drive support in its ROM, making it more difficult to update BIOS firmware.
Q4: How do I enable BIOS to boot from USB?
- To enable USB boot support, navigate to System Utilities > System Configuration > BIOS/Platform Configuration (RBSU) > System Options > USB Options.
- Take your pick of environments. The server can now boot from any USB drives connected to it, if this option is enabled.
- Do not lose your preferences by saving them.


Comments are closed.